
*This post may contain affiliate links for which I earn commissions.*
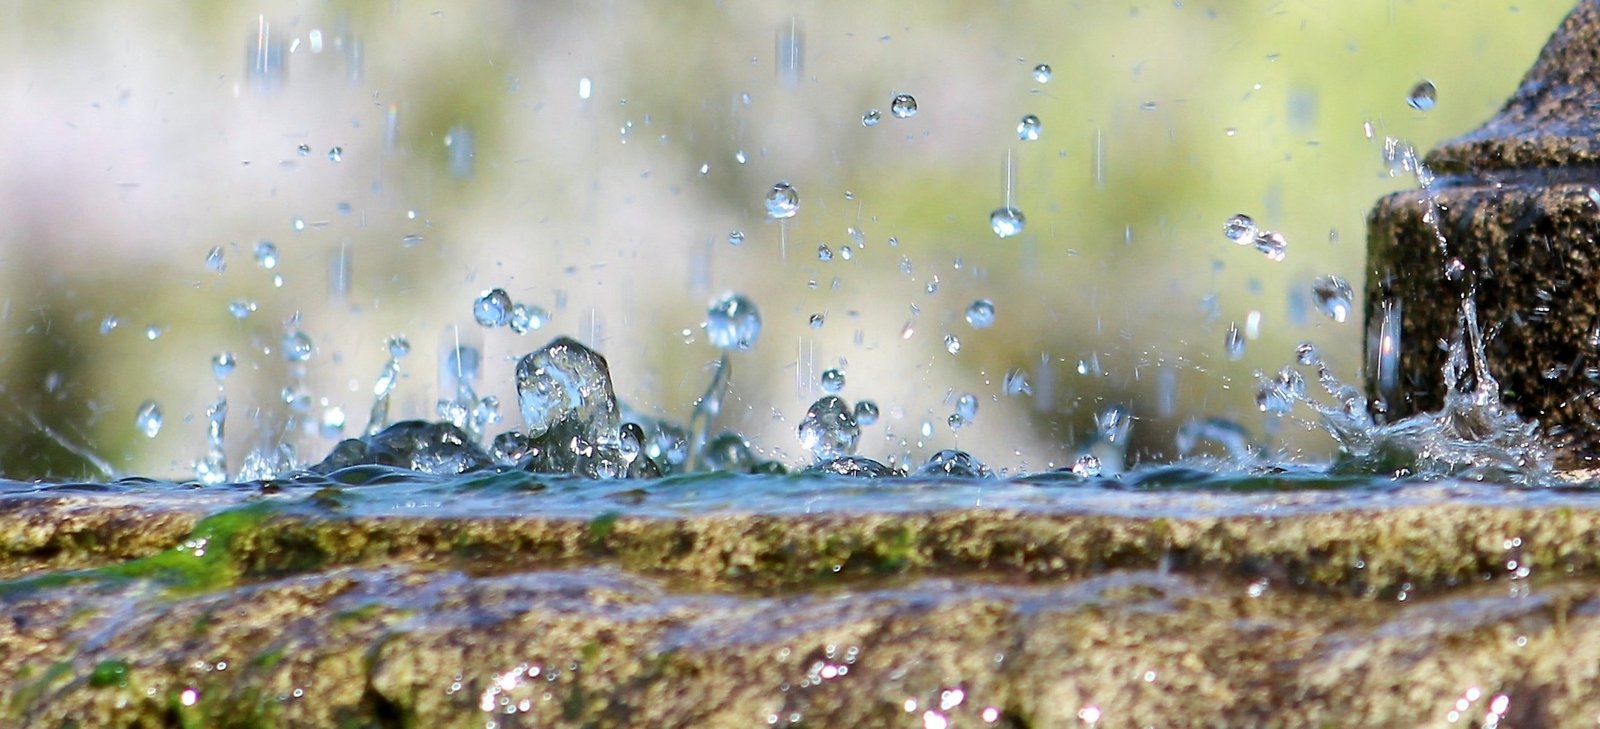
Rainwater harvesting isn’t just a trendy environmental buzzword; it’s a practical way to make your garden thrive while saving money and conserving resources. For those of us passionate about gardening, it’s like discovering a secret well in your own backyard.
Why Rainwater Harvesting Matters:
- Sustainability: By collecting and using rainwater, you’re reducing your reliance on municipal water supplies, which can be strained or treated with chemicals not ideal for all plants.
- Plant Health: Rainwater is naturally soft, and free from chlorine and fluoride, making it perfect for plants. It’s like giving your garden a drink of pure, unprocessed water.
- Cost-Effective: Even in small amounts, the savings on your water bill can be surprising. Every drop you collect is one less you pay for.
- Resilience: In times of water restrictions or droughts, having your own supply means you can keep your garden lush when others might struggle.

My Rainwater Journey:
I remember the first summer I decided to try rainwater harvesting in my garden. My water bill had been climbing, and I was curious if this could make a dent. I started with a simple setup, just a barrel beneath a downspout. To my delight, not only did my plants look healthier – with vibrant greens and more robust growth – but my water bill also took a noticeable dive. It wasn’t just about the money; there was something incredibly satisfying about using nature’s own gift to nurture my garden.
That year, my tomatoes were the talk of the neighborhood, and my herbs had never been so potent. It wasn’t just the water; it was knowing where it came from, how it was collected with care, and how it was being used to its fullest potential. Every time I watered my garden with rainwater, I felt a connection to the cycle of nature, which was both educational and deeply rewarding.
This guide is here to help you start your own rainwater harvesting journey. Whether you’re looking to save on water costs, ensure your garden’s health, or just join the movement towards sustainable living, I’ll walk you through the basics, share some of my favorite DIY projects, and help you avoid the pitfalls I stumbled into. Let’s make gardening not just a hobby, but a part of living sustainably.
Getting Started: Building Your System
Starting a rainwater harvesting system might seem daunting, but I promise, it’s easier than you think. Here’s how I got started with just a few household items, and what you’ll need to know to build your own.
How to Start Building a Basic Rainwater Harvesting System
Step-by-Step Guide:
- Identify Your Collection Points:
- Look for areas where rain naturally flows off your roof. For me, it was the downspout at the back of my house. If you don’t have gutters, you might need to add some or just place buckets where the water drips.
- Gather Your Materials:
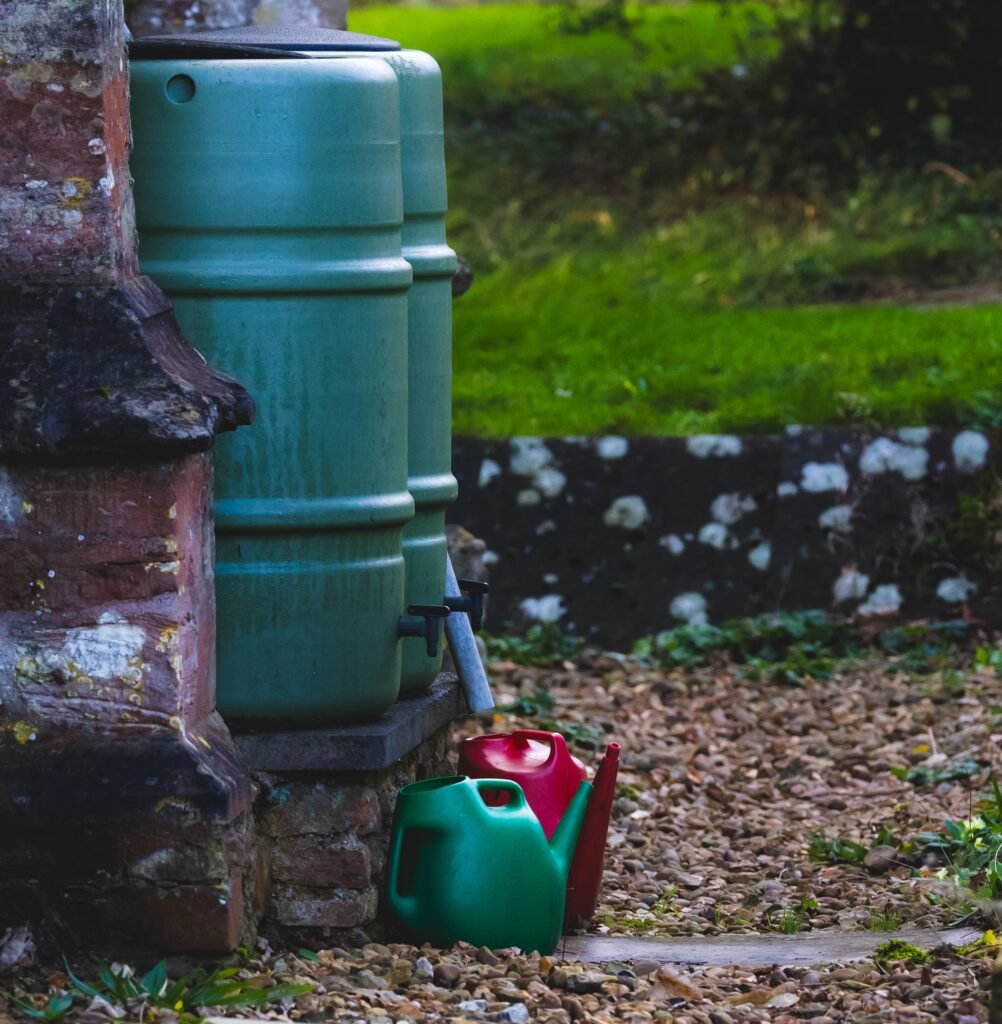
- Storage Container: An old barrel, trash can, or even a large pot will do. I started with a repurposed 55-gallon drum.
- Screen or Filter: To keep out leaves and debris. A piece of fine mesh or an old curtain works.
- Downspout Diverter: If you have gutters, you can make or buy one. I made mine using a simple elbow joint and some PVC.
- Set Up Your Collection System:
- Position the Container: Place your storage container on a stable, slightly elevated surface to aid in gravity-fed watering. I used bricks.
- Connect the Downspout: If you’re using a downspout, cut it to divert water into your container. I used a hacksaw for this and attached the diverter with waterproof sealant.
- Filter the Water:
- Cover the top of your container with the screen. This prevents mosquitoes and debris from getting in. I’ve used old window screens for this purpose.
- Overflow Management:
- Ensure there’s an overflow outlet. I drilled an additional hole near the top of my barrel and attached another piece of PVC to direct excess water away from my foundation.
- Use Your Water:
- I made a simple tap by drilling a hole near the bottom and fitting it with a faucet or valve. This lets me control the flow when watering my garden.
Essential Components of a DIY Rainwater Harvesting Setup
- Gutters and Downspouts:
- These channel the rain from your roof into your system. If you don’t have them, consider installing at least a partial setup where rain naturally falls.
- Filters or Screens:
- Essential to keep out leaves, twigs, and bugs. A basic leaf guard or even a piece of pantyhose can work wonders.
- Storage Containers:
- Barrels, tanks, or any large, waterproof container. They need to be food-grade if you’re using the water near edibles. I’ve seen everything from old whiskey barrels to repurposed kiddie pools.
- Overflow Systems:
- An overflow mechanism is crucial to manage excess water during heavy rain. This can be as simple as a second hole in your container or a more complex system with additional piping.
- Distribution System:
- How do you get the water out? A simple spigot works, but for larger setups, you might consider drip irrigation or a pump.
- First Flush Diverter:
- Optional but useful to divert the first contaminated water that washes off your roof. I made one using a simple PVC setup that diverts the initial dirty water away.
My journey with rainwater harvesting started with these basics, and it’s been a learning process of trial and error. I’ve found that the key is to start simple and expand as you learn what works best for your space and needs.
Understanding Water Collection
When I first dipped my toes into rainwater harvesting, one of the biggest questions on my mind was, “How much water am I actually going to collect?” Here’s how I figured it out, and how you can too:
How Much Water Can You Realistically Collect?
The amount of water you can collect with a DIY system depends on several factors:
- Rainfall: Obviously, if it’s pouring down, you’ll collect more. In my area, we get about 30 inches of rain annually, which is a decent amount for harvesting.
- Roof Size: The larger your roof, the more water you can capture. My modest city house has a roof surface of about 1,000 square feet, which isn’t huge but still yields a surprising amount of water.
- System Efficiency: This includes how well your gutters are maintained, how effective your filtration is, and whether your storage system captures all the water that comes off your roof. I learned quickly that a clogged gutter can reduce your yield significantly.
Factors Affecting Water Collection
- Rainfall Patterns: Seasonal changes mean your collection might vary. Here, we have a rainy season where I barely keep up with storage and drier spells where every drop counts.
- Roof Material: Some materials shed water better than others. My asphalt shingle roof has been fine, but I’ve heard metal roofs can be even more efficient.
- System Losses: Water can be lost to evaporation, especially in uncovered systems, or through leaks in poorly maintained setups.
Calculating Roof Surface Area for Water Collection
Here’s a straightforward way to estimate how much water you might collect:
Formula:
- Water Volume (Gallons) = Rainfall (inches) x Roof Area (square feet) x 0.623
Where:
- Rainfall: Measured in inches for the period you’re considering.
- Roof Area: You’ll need to measure this.
Step-by-Step Guide to Measuring Your Roof:
- Determine Roof Shape: Is it a simple rectangle, or are there gables or hips?
- Measure Length and Width:
- For a flat or simple gabled roof:
- Length: Measure from one end of the house to the other.
- Width: Measure across the width of the house.
- Area = Length x Width
- For more complex roofs, you might need to break it down into sections and add them up.
- For a flat or simple gabled roof:
- Account for the Slope: Since roofs are usually sloped, you’ll want to measure from the ground:
- Length: Measure from the ground at one corner to where the roof peak would touch if it were extended.
- Width: Same as above, but remember, if it’s not a flat roof, you’re measuring the horizontal distance.
- Use a Tool for Accuracy:
- A laser measurer can be handy if you have one, or you can use a good old tape measure and a bit of math.
- Calculate:
- If your roof is square or rectangular, multiply the two dimensions. For more complex shapes, sum the areas of each section.
Example: My roof is 50 feet long by 20 feet wide:
- Area = 50 ft x 20 ft = 1,000 sq ft
- If we get 1 inch of rain:
- Gallons = 1 inch x 1,000 sq ft x 0.623 = 623 gallons
Remember, this calculation gives you maximum potential, and actual collection can be less due to system inefficiencies.
By understanding these basics, I’ve been able to plan better for my garden’s needs, ensuring I have enough water even during less rainy periods. This knowledge has not only helped me save on water bills but also given me a deeper appreciation for every drop that falls from the sky.
Material Selection
When I first started my rainwater harvesting project, I was overwhelmed by the choice of materials. Here’s the lowdown on what you’ll need, along with some budget-friendly options I’ve learned to appreciate:
What Materials Do I Need for a Simple Rainwater Collection System?
Basic Materials List:
- Storage Container: Barrels or large drums to collect and store water.
- Gutters: To direct water from the roof.
- Downspout Diverter: To channel water into your storage.
- Funnel or Screen: To keep debris out of your storage.
- Spigot or Tap: To let water out when you need it.
- Overflow Pipe or Hose: To manage excess water.
- Support Blocks or Stand: To elevate your storage for gravity-fed watering.
- Sealant or Teflon Tape: For waterproofing connections.
Materials List for Different Budget Levels
Low Budget:
- Storage: Old food-grade barrels, large buckets, or even a clean trash can.
- Gutters: If you don’t have them, start small with a simple downspout diverter or place buckets under existing drips.
- Screen: Old window screens or fine mesh from a hardware store.
- Spigot: Repurposed from old appliances or a basic plastic one.
- Support: Bricks, cinder blocks, or wooden pallets.
Medium Budget:
- Storage: New or gently used water storage tanks, which are more durable and often come with fittings.
- Gutters: Add sections of vinyl or aluminum gutters where needed.
- Downspout Diverter: This can be a pre-made one or DIY from PVC pipes.
- Filters: More sophisticated mesh or leaf guards that last longer.
- Spigot: A better quality one for easier use.
Higher Budget:
- Storage: Large, above-ground tanks or even underground cisterns for significant storage.
- Gutters: Full seamless gutter systems for maximum efficiency.
- First Flush Diverters: Systems that automatically divert the first dirty water.
- Filtration: More advanced filtration for cleaner water, like UV or carbon filters.
- Automated Systems: Pumps, timers, or even solar-powered setups for ease of use.
Cost-Effective Materials for a DIY Rainwater System
- Barrels/Buckets: Look for food-grade options at local restaurants or farms that are getting rid of them. They’re often free or very cheap.
- PVC Pipes and Fittings: For diverters and overflows, PVC is both affordable and easy to work with. I’ve made all sorts of connections with just basic tools.
- Mesh or Netting: For filtration, old curtains or mesh from hardware stores work well and are budget-friendly.
- Repurposed Items: Old faucets from yard sales can serve as spigots. I’ve even used an old garden hose for overflow.
- Bricks or Pallets: For elevating your container, these are often free or very low cost.
- Sealant: A small tube of silicone sealant can go a long way in ensuring your connections don’t leak.
Economical Yet Durable Options:
- Recycled Plastic Barrels: They’re tough, UV resistant, and can last for years if maintained properly.
- Vinyl Gutters: While not the cheapest, they’re durable and resist rust, making them a good middle ground for longevity.
- Stainless Steel Mesh: A bit more on the pricier side but lasts much longer than plastic options for screens.
- Galvanized Steel Barrels: If you can find them second-hand, they’re incredibly durable for outdoor use.
My journey with material selection has taught me that you don’t need to spend a fortune to get started. It’s about being resourceful, looking for free or recycled materials, and expanding your system as you see fit and as your budget allows.
Safety and Usability of Collected Water
When I first started using rainwater in my garden, I was cautious about its safety. Here’s how I learned to ensure my collected water was plant-friendly:
Ensuring Water Safety for Plants
Water Quality:
- Initial Contamination: The first flush of rain can wash pollutants like bird droppings or dust from your roof. I’ve used a simple first flush diverter to let this initial dirty water runoff before collecting the cleaner rain that follows.
- Natural Cleanliness: Rainwater is generally soft and free of many chemicals found in tap water, which can be beneficial for plants. However, depending on your location, pollutants from the air might be present.
Filtration:
- Basic Filtration: A screen over your collection barrel prevents large debris from entering. I’ve used fine mesh or old pantyhose for this, simple but effective.
- Enhanced Filtration: For finer contaminants, you might consider a sand or charcoal filter. I’ve seen setups where water passes through layers of sand and activated charcoal to clear out any impurities.
Natural Treatment Methods:
- Sunlight Exposure: Letting water sit in a partially open container for a day or two allows UV from the sun to kill some pathogens. It’s not foolproof, but it’s a natural method I use for non-edibles.
- Aeration: Agitating the water or letting it splash as it enters the container adds oxygen, which can help reduce stagnation and associated bacteria. I’ve found this also helps with algae control.
Using Rainwater for Different Plant Types
For All Plants, Including Vegetables:
- Safety for Edibles: If you’re growing vegetables, you want to be extra sure your water is clean. I avoid using rainwater directly on veggies during heavy pollen or pollution days. Also, ensure your collection system isn’t near potential contamination sources like chimneys or bird nests.
- Acidity: Rainwater tends to be slightly acidic, which is generally good for most plants but might need buffering for some. I’ve added a bit of lime to my soil occasionally to balance the pH for acid-sensitive plants.
Considerations for Plant Types:
- Ornamentals vs. Edibles: While ornamentals might be less fussy, with edibles, I’m more cautious. I often use rainwater for watering the soil around the base of plants rather than overhead to minimize leaf contamination.
- Soil Health: Rainwater can improve soil structure by not adding salts or chemicals that might be in municipal water. However, I keep an eye on soil pH, as rainwater can leach away minerals over time, especially in sandy soils.
- Watering Needs: Plants like tomatoes or peppers, which prefer well-drained soil, thrive on rainwater, but I adjust watering based on plant needs and weather conditions to avoid over-watering.
My Experience:
- I’ve noticed that my plants, especially my vegetables, seem to respond better to rainwater. The colors are more vibrant, and there’s less leaf burn from salts. However, I always monitor plant health to catch any signs of nutrient deficiencies or disease that might be exacerbated by the water quality.
In essence, with a bit of attention to water quality and plant-specific needs, rainwater can be a boon for your garden. It’s about balancing the natural benefits with a touch of vigilance to ensure your garden thrives.
Managing Overflow and Maintenance
Dealing with overflow and keeping your rainwater harvesting system in tip-top shape is key to its longevity and efficiency. Here’s how I handle these aspects:
Dealing with Overflow During Heavy Rains
Design Tips for Overflow Management:
- Overflow Pipe: I’ve installed an overflow pipe on my storage barrel. When the water level gets too high, it automatically directs excess water away from my home’s foundation.
- How to: Drill a hole near the top of your storage container, and attach a piece of PVC or hose that leads to a safe drainage area.
- Multiple Containers: If one barrel isn’t enough, I connect several in series. When the first fills up, water overflows into the next one. It’s like a mini waterfall in my backyard!
- Connection: Use a hose or PVC pipe to link the overflow outlet of one barrel to the inlet of another.
- Redirect to Garden: I’ve set up my overflow to direct water towards my garden or a rain garden area, turning potential waste into an asset.
- Design: Ensure the overflow path doesn’t lead to erosion or pooling in unwanted areas.
My Experience: One stormy summer, I learned the hard way that without proper overflow, my yard could become a mini lake. Now, with my setup, I watch the rain with peace of mind, knowing my system can handle Mother Nature’s surprises.
Maintenance of a Rainwater Harvesting System
Regular Checks:
- Gutters and Screens: Every few months, I clean out leaves and debris from my gutters and check that the screens over my barrels are clear. Clogged gutters can mean lost water.
- Check: After heavy leaf fall or before big rains.
- Container Integrity: Look for cracks, rust, or wear where water might leak out. I’ve had to replace a barrel once because of sun damage.
- Inspection: Every season, give your containers a good look-over.
- Lid and Seals: Ensure lids are secure to keep out bugs and critters. I’ve found that good seals also reduce evaporation.
- Maintenance: Check after strong winds or heavy rains.
Cleaning:
- Flush the System: At least once a year, especially in spring, I flush my system with clean water to remove any sediment or stagnation from the bottom of the barrels.
- Method: Open the tap and let the water run until clear.
- Algae Prevention: I’ve learned that keeping the container out of direct sunlight helps, but if algae does appear, a bit of apple cider vinegar or hydrogen peroxide can keep it at bay without harming plants.
- Routine: Clean or treat every 6 months or as needed.
Maintenance Schedules:
- Monthly: Quick checks for debris in gutters, screens, and around the base of your containers.
- Seasonally: Deep clean, and inspect for damage or wear, particularly before and after the rainy season.
- Annually: Replace filters, check and possibly replace seals, and do a full system flush.
By maintaining your system, not only do you ensure it functions well, but you also extend its life, making your investment in sustainability worthwhile. Plus, there’s something very satisfying about knowing your garden is thriving thanks to your well-managed rainwater collection.
Enhancing System Efficiency
Efficiency in rainwater harvesting means getting the most out of every drop. Here’s how I’ve improved my system’s performance:
Purifying and Filtering Rainwater
DIY Filtration Methods:
- Sand and Charcoal Filter: For finer purification, I’ve made a simple filter using layers of sand, gravel, and activated charcoal.
- Construction:
- Use a bucket or barrel with holes at the bottom.
- Layer from bottom to top: gravel, sand, activated charcoal, more sand.
- Water passes through, leaving sediment behind.
- Construction:
- Screen and Mesh Filters: At the entry point, a fine mesh or screen prevents large debris. I’ve used old window screens for this.
- First Flush Diverter: To avoid collecting the initial dirty water, I’ve made a diverter that allows the first few gallons to bypass the storage container.
- Necessity: Especially useful if your roof collects a lot of debris or if you live in an area with significant air pollution.
When Filtering is Necessary:
- If you’re using the water for edibles, or if you notice sedimentation or odor in your collected water.
- After heavy pollen seasons or if your roof collects a lot of particulates.
Rainwater Harvesting in Small Spaces
Compact Systems for Balconies or Patios:
- Container Gardens with Integrated Collection: Use pots or planters with drainage holes that lead to small collection containers. I’ve seen this done with decorative planters that covertly collect water.
- Vertical Solutions: Hang small gutters or use awnings to collect water into narrow containers or hanging baskets below.
- Folding Barrels: For balconies, collapsible water containers can be stored away when not in use but deployed during rainy periods.
Space-Saving Designs:
- Multi-level Collection: Use stackable or tiered containers where overflow from one leads to another below.
- Window Box Systems: Small gutters can be installed under window boxes, directing water into a compact reservoir.
Connecting Multiple Rain Barrels for Larger Storage
Linking Barrels:
- Position Barrels: Place your barrels at different heights if possible to facilitate gravity flow.
- Drill Holes: Near the bottom of the top barrel and near the top of the next one for overflow.
- Connect with Pipes: Use PVC pipes or hoses to connect these holes. Ensure all connections are sealed to prevent leaks.
- Step-by-Step:
- Cut or buy connectors to fit your barrel sizes.
- Use waterproof sealant or Teflon tape on threads.
- Connect, ensuring water can flow from one to another.
- Step-by-Step:
- Overflow Management: The last barrel should have an overflow outlet to prevent spillage.
Integrating Greywater with Rainwater
Combining Systems:
- Greywater for Non-Edibles: Use greywater (from laundry or showers) in areas where you’re not growing food while reserving rainwater for edibles or more sensitive plants.
- Dual System Setup:
- Rainwater for Vegetables: Direct your clean rainwater into your vegetable garden.
- Greywater for Ornamentals: Set up a separate greywater system, perhaps using a simple bucket system or drip irrigation for flowers or shrubs.
- Filtration: Use natural filtration like reed beds for greywater if you want to integrate it more with your garden’s water needs.
My Experience: I’ve found that combining these systems not only maximizes water use but also teaches a holistic approach to water management in gardening.
By focusing on efficiency, whether through purification, space-saving designs, or system integration, you’re not just conserving water; you’re creating a more resilient garden environment.
Benefits and Economic Impact
When I first ventured into rainwater harvesting, I was curious about both the environmental and financial benefits. Here’s what I’ve learned about saving money and enhancing my garden:
Can Rainwater Harvesting Reduce My Water Bill?
Real-World Examples:
- My Personal Experience: After setting up my system, I saw a noticeable decrease in my water bill. In one particularly rainy summer, I saved about 30% on my water costs just by using collected rainwater for my garden.
- Community Case: I know a neighbor who, after installing multiple barrels, reduced their water bill by half during the wet season. They used rainwater not just for the garden but also for washing cars and topping up pools.
Potential Savings:
- Rainy Seasons: If you live in an area with regular rainfall, you can offset a significant portion of your water usage for gardening, cleaning, or even laundry if you’re daring enough.
- Scale Matters: The more water you collect and use, the more you save. Even a small system can make a dent, but the savings grow with system size.
- Water Restrictions: In times of drought or water restrictions, having your own supply means you’re not reliant on potentially more expensive or limited municipal water.
Benefits of Using Rainwater Over Tap Water for Gardening
Water Quality:
- Soft Water: Rainwater lacks the minerals and chemicals like chlorine or fluoride found in tap water, which can be harsh on plants. My plants seem to thrive on this softer, purer water.
- pH Balance: Generally, rainwater is slightly acidic, which is ideal for many plants, especially those that prefer acidic soil like azaleas or blueberries.
Plant Health:
- Reduced Leaf Damage: Without the chlorides in tap water, there’s less risk of leaf burn or salt accumulation in the soil, which I’ve seen improve the health and appearance of my foliage.
- Better Nutrient Uptake: The lack of chemicals can lead to more efficient nutrient absorption by plant roots, promoting stronger growth.
- Pest and Disease: Some anecdotal evidence, including my own observations, suggests that plants watered with rainwater might be less susceptible to certain pests or fungal diseases.
Environmental Impact:
- Conservation: By harvesting rainwater, you’re reducing demand on local water supplies, which can be crucial in areas facing water scarcity.
- Stormwater Management: Collecting rainwater helps reduce runoff, which can prevent soil erosion and lessen the burden on municipal stormwater systems.
- Sustainability: It’s a step towards a more self-sufficient lifestyle, reducing your environmental footprint by minimizing the energy used to treat and pump municipal water.
- Local Ecosystem: Less runoff means less pollution entering our waterways, helping to maintain local aquatic ecosystems.
By integrating rainwater harvesting into my life, I’ve not only seen economic benefits but also felt a deeper connection to the natural cycles around me. It’s about more than just saving money; it’s about creating a balance where we live more harmoniously with our environment.
Urban and Seasonal Adaptations
Living in an urban environment or dealing with seasonal weather shifts doesn’t mean you have to abandon the idea of rainwater harvesting. Here’s how I’ve adapted my system:
Creative Rainwater Harvesting in Urban Environments
Innovative Ideas for City Dwellers:
- Balcony Barrels: Even with limited space, I’ve seen people use decorative pots that double as rain collectors. A small, stylish barrel or even a repurposed trash can can fit on most balconies.
- Window Box Gutters: Attach mini-gutters under window planters or air conditioners to collect drip water. This water can then be funneled into small containers.
- Rooftop Rain Gardens: If you have access to a rooftop, create a rain garden or use planters that collect runoff, turning your roof into a mini-ecosystem.
- Vertical Collection: Use trellises or vertical planters with integrated water capture systems. Rainwater can trickle down into collection pots at the base.
- Community Sharing: In apartments or condos, consider communal systems where collected water is shared among residents for gardening or cleaning.
- Indoor Plants: Collect water from indoor condensation on windows or from dehumidifiers to water houseplants, effectively recycling indoor moisture.
My Urban Experience: Living in a city apartment, I’ve adapted by placing a rain bucket under a downspout in a shared courtyard, with neighbors’ permission. We all take turns using the water for our potted plants, building community while saving resources.
Adapting to Seasonal Changes, Like Winter
Winterizing Your Rainwater System:
- Drain the System: In colder climates, I drain all water from my barrels and pipes to prevent freezing and cracking.
- How to: Open all taps and valves, remove any water from gutters and downspouts, and tilt barrels to drain completely.
- Insulate: Wrap pipes and barrels with insulating material to keep them from freezing. I’ve used foam pipe insulation for this.
- Cover Up: Use lids or tarps to cover barrels, keeping out snow and keeping what’s left inside warmer.
- Disconnect: Remove any parts that might hold water if they’re not freeze-resistant. This includes disconnecting hoses from barrels.
Using Collected Water in Colder Months:
- Indoor Gardening: Store enough water before winter to use for indoor plants. I’ve kept a few barrels full for this purpose.
- Snow Melting: Collect snow in your barrels and let it melt for use later. This can be a fun way to extend your water collection into winter.
- Water Features: If you have a small water feature, use collected rainwater to keep it topped up, reducing the need to use treated water.
- Emergency Water: Even if you’re not using it for gardening, having stored rainwater can be handy for emergencies or for flushing toilets during a winter water outage.
- Humidity: Use the water to increase indoor humidity through evaporation, which can be beneficial during dry winter months.
My Winter Adaptation: I’ve learned to treat my rainwater system as part of my seasonal prep. By storing water in early fall and protecting my setup from the cold, I ensure I’m ready for both gardening and household needs through the winter.
Adapting to urban living and seasonal weather is all about creativity and preparation. Whether it’s sharing resources in the city or preparing for the cold, these adaptations have made my rainwater harvesting not just practical but also a year-round joy.
Common Pitfalls
Setting up a rainwater harvesting system has been an adventure filled with lessons learned, often the hard way. Here are some common mistakes to sidestep, based on my journey:
Common Mistakes to Avoid
Neglecting Overflow Management:
- Lesson Learned: I once didn’t account for heavy rain, and my yard became a small pond. Always ensure you have an overflow system in place.
- Avoid: Install an overflow pipe or set up multiple barrels to handle excess water.
Ignoring Maintenance:
- Personal Oops: Skipping regular checks led to a clogged gutter, and missing out on a significant amount of rain.
- Avoid: Clean gutters, check for leaks, and flush your system at least seasonally.
Using the Wrong Materials:
- My Misstep: I initially used a non-food-grade barrel for vegetable garden watering, not realizing the potential for chemical leaching.
- Avoid: Use food-grade containers for water that will nourish edible plants. Check for UV resistance for outdoor use.
Overlooking Water Quality at the Start:
- Experience: The first water off the roof can be dirty, and I once didn’t divert it properly, leading to sediment in my storage.
- Avoid: Implement a first flush diverter or at least manually flush the system after long dry spells.
Not Securing the System:
- What I Learned: My first barrel wasn’t secured, and a windy day blew it over, spilling all my collected water.
- Avoid: Ensure containers are stable, using straps or placing them in sheltered spots.
Underestimating Space and Placement:
- My Space Issue: I placed my barrel too close to my house, causing water to pool against the foundation during heavy rain.
- Avoid: Plan your placement to ensure overflow doesn’t cause issues, and consider space for expansion if you plan to add more barrels.
Forgetting About Mosquitoes:
- My Bug Battle: Without a proper lid, my barrel became a mosquito nursery.
- Avoid: Always cover your storage with a tight-fitting lid or screen to prevent mosquito breeding.
Ignoring Seasonal Adaptations:
- Winter Woes: Not draining my system before the first freeze led to a cracked barrel.
- Avoid: Winterize your system by draining, insulating, or covering as needed.
Not Planning for Use:
- Missed Opportunity: I didn’t initially think about how I’d use the water beyond the garden, missing out on other potential uses like washing cars or topping up pools.
- Avoid: Consider all possible uses for your collected water to maximize your system’s benefits.
Overcomplicating the System:
- Complexity Confusion: My early designs were overly complex, causing more problems than they solved.
- Avoid: Start simple. You can always add complexity or capacity later as you understand your needs better.
By being aware of these pitfalls, you can set up a system that’s not only functional but also lasts longer and serves you better. Each mistake has been a lesson in sustainability and patience for me, making the journey towards self-sufficiency both educational and rewarding.
Protecting Your System
One of the challenges I’ve faced with my rainwater harvesting system is keeping it pest-free, especially from mosquitoes. Here’s how I’ve learned to safeguard my setup:
Preventing Mosquitoes and Other Pests
Preventive Measures:
- Secure Lids: The first and most crucial step is to ensure your storage container has a tight-fitting lid. I’ve found that even a small gap can be an invitation for mosquitoes.
- How to: Use barrels with screw-on lids or secure a cover with bungee cords or straps.
- Mesh or Screening: Cover any entry points with fine mesh. I use window screen material to cover the top of my barrels if they don’t have built-in screens.
- Installation: Cut the mesh to fit, and secure it with a frame or directly around the barrel opening, ensuring no gaps.
- Overflow Screening: Don’t forget to screen overflow outlets. I’ve seen mosquito larvae in my overflow lines because I initially left them open.
- Tip: Use mesh or caps on overflow pipes to prevent pests from entering while still allowing water to escape.
Natural Deterrents:
- Mosquito Dunks or Bits: These contain Bti, a natural bacteria that only affects mosquito larvae. I drop one in each barrel at the start of mosquito season.
- Usage: Follow package instructions; usually, one dunk treats a significant amount of water.
- Plant Allies: Certain plants like citronella, lavender, or marigolds can deter mosquitoes. I’ve planted these around my rain barrels to create a natural barrier.
- Placement: Position these plants near your collection points or in pots around your system.
- Maintain Water Movement: Mosquitoes prefer still water. I’ve rigged up a simple system where water drips from one barrel to another, keeping the water slightly disturbed.
- Method: Use a small hose or pipe to create a slow, continuous flow between containers.
- Biological Controls: Introducing fish like guppies or mosquito fish into larger water features or ponds can help control larvae if part of your system includes standing water for decorative purposes.
- Note: This isn’t practical for direct drinking water storage but can be part of an integrated garden water management system.
Other Pests:
- Rodents: Secure your system against rodents by ensuring there are no entry points where they can climb in. I’ve used metal mesh around overflows and inlets.
- Birds: Birds can also be attracted to water sources. A simple deterrent is to use wire or netting over open areas or where water might collect.
- Algae: While not a pest per se, algae can be a problem. I’ve found that keeping barrels shaded and adding a bit of apple cider vinegar helps manage algae growth without harming plants.
My Experience: After dealing with a summer mosquito boom, these practices have made my rainwater system much more enjoyable to manage. It’s about creating an environment where your system can thrive without becoming a breeding ground for unwanted guests.
Conclusion
Rainwater harvesting has transformed my approach to gardening, making it not just a hobby but a sustainable way of life. Here’s why embracing this practice is so crucial:
The Importance of Rainwater Harvesting
- Sustainability: By collecting rainwater, I’ve reduced my dependence on municipal water supplies, which are often strained resources. It’s a small but significant step towards living more sustainably.
- Plant Health: The plants in my garden have never looked better since I switched to rainwater. It’s free from the chemicals in tap water, leading to more vibrant growth and fewer pest issues.
- Financial Savings: The reduction in my water bill has been a pleasant surprise. Every drop collected is one less I pay for, making my gardening not just good for the environment but also for my wallet.
- Resilience: Having an independent water source means I’m better prepared for water shortages or restrictions. It’s about building resilience into our living spaces.
- Environmental Impact: Less runoff from my property means less pollution entering our waterways. It’s a win for local ecosystems, helping to maintain balance in urban environments.
Start Small and Adapt
- Begin with Basics: My journey started with one barrel and a simple diverter. You don’t need to overhaul your entire system at once. Start small, learn, and expand as you see fit.
- Experiment and Learn: I’ve found joy in experimenting with different setups, learning from both successes and failures. Each season brings new insights on how to better manage and use the water I collect.
- Adapt to Your Space: Whether you’re in a city apartment or have acres of land, rainwater harvesting can be tailored to your situation. I’ve shared ideas for urban dwellers and how to manage seasonal changes, proving there’s a solution for everyone.
- Community Involvement: Sharing knowledge and maybe even water with neighbors has built community spirit. It’s not just about your garden but about fostering a culture of sustainability where you live.
- Keep Learning: As with any new skill, there’s always more to learn. I encourage you to dive in, ask questions, and maybe even join local groups or forums to share and gain knowledge.
Rainwater harvesting isn’t just about collecting water; it’s about connecting with nature in a way that benefits us all. It’s a practice of patience, creativity, and care for our planet. So, whether you’re just starting or looking to refine your system, remember, that every drop counts.